Category Archives: Blood Angels
Tournament Review: NOVA 40k GT 9.12 Part 1
Hey all Son of Adam back again after a long weekend in Virginia at the NOVA open 40k GT, and I am wiped out. A bunch of the fellas and I drove down there and put up in the Hyatt hotel in Crystal City. We arrived Thursday night and checked out the scene.
There were a bunch of vendors that came out. The War Store was there, Grex Airbrushes, I was lucky enough to get a conversation in with Rob from Spiky Bits, among others. There was a huge room setup with tables and terrain for 40k. Warmahordes had its own room, as did Warhammer Fantasy. All in all it was very well done and had a lot of work put in.
I feel totally wiped out as I was sick most of the weekend, and have been trying to recover since then, but I wanted to get at least a preliminary report of the weekend out there for you all. If any of you have any specific questions about the event or any of the games leave a comment and I will get back to you.
![IMG_0913[1]](https://mastercraftgaming.com/wp-content/uploads/2012/09/img_09131.jpg?w=1024&h=764)
There was a huge hall dedicated to 40k. There were more tables in another room beyond this one and about double this size behind me.
HQ: Farseer with Jetbike, Stones, Fortune, Doom, Runes of wit and ward. 10 Warlocks on bikes with 8 destructors, 1 enhance, 1 embolden, and 2 spears.
HQ: Farseer with Jetbike, Stones, Guide, Mind War, Doom, Eldrich Storm, Runes of wit, and a spear.
Troops: 10 Rangers
Troops: 10 Rangers
Troops: 3 Guardian Jetbikes
Troops: 3 Guardian Jetbikes
F.A.: 5 Swooping Hawks, with an exarch skyleap, and Hawks Talon
Fort: Aegis
HQ: The Duke (Dark Eldar Allies)
Troops: 20 Kabalite Warriors with 2 Splinter Cannons
![IMG_0918[1]](https://mastercraftgaming.com/wp-content/uploads/2012/09/img_09181.jpg?w=1024&h=764)
This was the army that I brought on its display.
HQ: Librarian
Troops: Tactical squad with melta, multi-melta, power weapon in a pod.
Troops: Tactical squad with plasma, and lascannon.
Troops: Assault squad with Power Weapon
Troops: Assault squad with Power Weapon
HS: Vindicator
HS: Vindicator
HS: Vindicator
Fort: Aegis with a quad-gun
HQ: Company Command with 4 melta guns (IG Allies)
Troops: Infantry Platoon with 4 flamer command, and two flamer auto-cannon squads.
FA: Vendetta Gunship
HS: Manticore
The mission was P: Kill Points, S: Quarters, and T: Objectives with a Dawn of War deployment. I won the roll to go first and took it. I deployed all of my snipers on different objectives and dropped the Deldar in the aegis on my own objective. He threw his tanks to my right flank, and all of his troops to my left. In the first turn the council boosted up to surround all of the armor and the rest of my army took some shots with little effect. In his first turn, the manticore dropped a bunch of Deldar and the rest of his vidi’s tank shocked my council. His drop pod came down on my left flank and got in place to remove those snipers.In my turn two, I used puppet master to fire his manticore at his blob squad and then multi-assaulted it with the rest of the vindis. My other squads fired and didn’t do much else. In his turn two, the assault marines deep-struck and shot without doing damage, and the drop pod squad came in and destroyed the snipers on my left objective.
For my turn three, the council flat out over to the blob, and all of the snipers and Deldar dropped the assault marines. For his turn three the vendetta came in and the squad inside flamed the council and everything else shot at them.
In my turn four, the council moved up and declared against the blob, but got shots on the command squad and tac squad as well. With the fire power I dropped the command and most of the blob as well as a few marines. The rest of the army shot at the tacs sitting on my left objective. Then I charged the rest of the blog with the Librarian and the tac squad. I killed all but a few and he took some down as well. In his turn four the platoon command moved out of the way, and in combat his librarian went down, but took down one of my farseers, and all but one of the tactical marines was left.
In my turn five the council moped up the last marine and the hawks came down to contest the tacs on my objective. The rest of the fire power dropped the flamer squad and my guardians jumped onto different objectives. He didn’t have much else to do with his turn and the game ended. The result was P: 13/2, S: 4/0, and T: 4/0.
In game two I played another gentleman who was 1/0 and was playing Necrons. His general list was:
HQ: Overlord with the works
HQ: Overlord in Barge
Troops: 18 warriors with 2 Voltaic-teks
Troops: 9 Immortals with a Lance-tek and lord with a Scythe
Troops: 9 Immortals with a Lance-tek and lord with a Scythe
Troops: 5 Warriors in a Ghost Ark with Tremor-Tek
FA: 6 Scarabs
HS: 1 Spyder
HS: Annihilation Barge
HS: Annihilation Barge
The mission was P: Quarters, S: Objectives, T: KPs with a Hammer and Anvil Deployment. He made me go first and I setup the Deldar in the aegis again with it being strung out between the two objectives on my side, and I infiltrated the snipers on one of my objectives and on the center objective. He dropped the big squad with overlord in a ruin with an objective. The scarabs were on the far side of his deployment and the barges and ark were deployed centrally.In the first turn I knocked off a couple of models and flat out the council towards the scarabs and away from a lot of his fire power to try and bait the swarms in. In his side of turn one he moved everything up and took the bait on the council. I used all 8 Destructors in overwatch and killed off all of the scarabs before they even got in for combat.
In turn two, I jumped the council up and multi-assaulted the big squad, the middle squad and the spyder. (This was my mistake at NOVA, luckily it wasn’t too important). In the combat I killed a bunch of stuff and the middle and far squads broke, but the spyder had one wound left on him and kept me tied up so that I couldn’t cut the others down. On his side of the turn, both squads regrouped and the command barge charged the council. Everything else moved up and one of the scythes came in and did some ineffectual shooting. In combat I did some damage to the barge and killed the lord and the spyder.
In turn three, I threw the council into the ghost ark and the two re-grouped squads and killed most of them and cut down the rest. Because our time was running out, I flat out the jetbikes onto the objectives. On his side of the turn the squad inside the ghost ark was surrounded and what was left advanced to try and contest objectives. The game ended there from time constraints and the result was P: 4/0, S: 5/0, and T: 9/0.
For the third round I played a game that was essentially played in the head of my opponent and me. Not much happened on the table, death-wise, but we both danced for position all game. This was a fantastic game against a great opponent. I apologize that I forgot your name friend, but if you see this go ahead and send me a message. He took the following Draigo-Cron List:
HQ: Draigo
HQ: Coteaz
Troops: 10 man paladin squad with the fixins
Troops: 3 Acolytes
FA: Interceptor Squad
HQ: Destroyer Lord (Cron Allies)
Troops: 5 Warriors in a Scythe
Troops: 5 Warriors in a Scythe
FA: 6 Wraiths
HS: Doom Scythe
The third mission was P: Objectives, S: KP, T: Quarters with a vanguard deployment. He won the roll for first and passed it to me. I setup the Deldar in their Aegis around my back objective, and infiltrated the snipers onto the two corner objectives. He deployed Draigo and boys behind the center piece of terrain, and the wraiths defensively behind his back objective. In turn one I put some wounds on the pali’s and moved my council all the way to my left side (I knew that if I got tied up with the Pali’s that the wraiths had the movement to come in and together beat the council). He replied to this bait by moving Draigo and boy to the opposite side towards my snipers, but still in range of the wraiths.
For my turn two I had to redploy the council in a defensive position guarding the Deldar and the snipers who were getting in range of a Pali charge now, and both of my guardians came on. In his turn two all of his sythes came on as did his interceptor squad. The scythes targeted the guardians and got all but one. He backed off with Draigo and pushed back into his deployment zone.
In my turn three I baited with the guardian that was left, and moved the council back to the middle, but close enough to kill whatever went after the guardians and close enough to bait the paladins into combat, but far enough that it would be a long charge. I threw down Hallucination on the paladins and it made them attack themselves, but with the stave he saved all 12 of his wounds (I had a bit of bad luck all weekend except the last game, which you will see). He replied by backing up further with Draigo and shooting down the guardian with a scythe. His acolytes came on and tried to hide.
In my turn four the swooping hawks killed a few of the interceptors and they broke off the table. The seer council came by to support the corner objective and leave themselves in range of Draigo’s squad. The snipers hid and shot down the acolytes. In his side of the turn he took all of his scythes off the table, moved Draigo backwards again, and brought the wraiths forward to threaten the near corner snipers.
For my turn five, I jumped the council in front of the wraiths in order to fill their space for a charge towards that objective. I dropped the swooping hawks back onto his home objective that was now abandoned by his wraiths. In his turn five all of his scythes came back on. The two night scythes dropped of their cargo and killed what was left of the snipers on the far corner objective. He broke off his destroyer Lord and just managed to be able to jump him over the council and contest the center objective. The paladins were remarkably able to kill 4 of the council and the Wraiths managed to get the charge range they needed to assault the swooping hawks, wiping them out.
We had plenty of time, but we rolled and the game ended. The result was P: 2/2. S: 2/4, T: 2/2. We tied on all of the victory conditions (KPs needed to be by three), so it came down to victory points, and he had 30 more than me and won the game. I needed another turn to finish off the killing blow, but didn’t get it.
For the fourth round I played against David Jensen, one of the guys that work for Stiff Neck Studios. He brought the following Necron Air force list:HQ: Obyron
HQ: Destroyer Lord
Elite: Lychguard in a Night Scythe
Elite: Deathmarks in a Night Scythe
Troops: Warriors in a Night Scythe
Troops: Warriors in a Night Scythe
Troops: Warriors in a Night Scythe
HS: Doom Scythe
HS: Doom Scythe
HS: Doom Scythe
This mission was P: Quarters, S: Objectives, T: KP with a Dawn of War deployment. My opponent again won first turn, and again passed it to me. For deployment I dropped my Deldar in the aegis next to my right objective and infiltrated the snipers on the middle and his left objective. He placed Obyron out of line of sight in a building. For my first turn I flat out the council surrounding Obyron, and on his side he waited.
For the top of two, I shot at and charge Obyron with the entire council. I rolled terribly and only got 30+ wounds on him, all of which he passed (told you I had some bad luck). In return he killed one of the council (That is 950 pts with a full volley and charge, which resulted in not a single failed wound and a lost combat against the one model). In his turn a bunch of his fliers came on and shot a lot into the Deldar and snipers taking a few casualties as I went to ground. The lychguard came in and he placed them in a position to charge the council in the following turn. Again in combat, the entire council fought against Obyron and dealt 12 wounds (compared to the 24 by math) and again Obyron didn’t fail any while still taking another councilman down.
For my turn three, the guardians came on and I wasn’t able to do anything against the fliers, so the snipers shot at them to no avail. In combat the same thing continued to happen, half as many wounds caused and way too many saves made. On his side of the turn all of his scythes shot down my guardians and the lychguard charged in and did average damage, and again I couldn’t kill enough to make it matter.
For turn four, the council finally did what it was supposed to and dropped a bunch of the guard and Obyron in a single round of combat and cut down the leftovers. All the while, the rest of my army sat tight and waited for the end of the game. For his turn four a bunch of the scythes went to work on the now free council, while the rest whittled down one of the sniper teams to a few members.
For my turn five, I preemptively covered up all of the angles for the scythes while denying and claiming all potential quarters and objectives. In his turn he realized that if the game were to end there was no chance for him, so he flew everything off the table that could fly off except the deathmarks with the destroyer lord who came down and tried to put enough wounds on the warriors to break them. My bad luck continued and unlike the previous game, the game continued when I needed it to end.
In my turn six I was in a pretty bad spot, nothing of his was on the table, but it was all coming from a place that I couldn’t stop. I moved out my guys into places that were the best I could manage to try and win by quarters. I dropped his destroyer lord and some of the deathmarks but they held and I failed the charge on them with the swooping hawks even with the fleet roll. In his turn six I was pretty exposed. He dropped the hawks, the remaining snipers on his objective and was able to get the deathmarks in to contest the center objective. Now when I needed the game to continue it didn’t. It ended up being P: 2/2, S: 2/1, T: 3/3. Dave ended up winning on the secondary.
I ended up placing in the lowest 3/1 bracket going into the finals with two high winning scores and two very closely scored losses. If you guys want to hear how the last matches went post it below. If this is too long and you only want to hear the abbreviated version just post it below and I will be quicker about it.
I will say that I made it to the finals for my bracket and did get to play against some pretty good opponents, but you will have to wait for next time, I don’t want to ruin the surprise.
Paul’s Blood Angels, Take Two
Hey all, themightysquig here bringing you just one extra photo of Paul’s Blood Angels. You may remember them from a recent Battle Report and Strategy Follow-up, the Battle Report Teaser, and his Army Showcase. Well, the internets have raged a bit about how some of his models were not fully painted and lacking heads. The internets can be so demanding sometimes. Well, lucky for you, Paul saw the comments and decided to give the people what they wanted: fully painted Blood Angels. Enjoy.
I hope you’re happy, internets. 🙂 Thanks Paul for showing us these wonderfully painted models!
Battle Report: Eldar (Saim Hann) vs Space Marines (Salamanders) w Blood Angel Allies (1500pts)
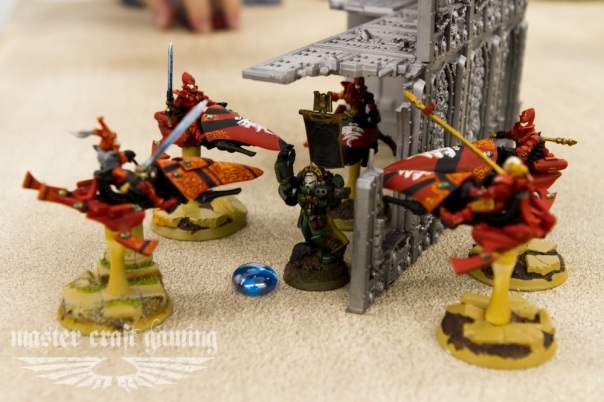
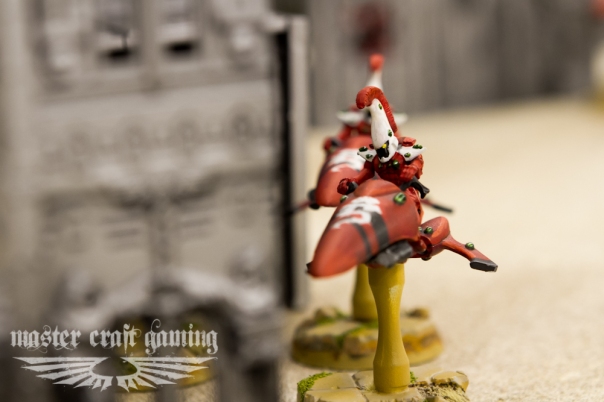
Check this out guys. I match up against Paul over at “For Holy Terra.” We played mission 5 for those of you that remeber that strategy post, you can see it played out in action. If you have some ideas for more reports let us know. Any other armies you want to see played, just post below.
Check back soon for a strategy discussion video about this match. I will sit down and give you guys some commentary about how I decided to go about playing the game and the strategy that I had in mind.
Thanks to incompetek for the soundtrack.
Here is the Salamanders with Blood Angels army list.
HQ – Pedro Kantor
Troops – 5x Scouts w/Telion, 3x Sniper Rifles & Missile Launcher
Troops – 5x Scouts, Sergeant w/Sniper Rifle, 3x Sniper Rifles, Missile Launcher, Camo Cloaks
Elites – 10x Sternguard, Sergeant w/ Power Fist & Combi-Melta, 2x Meltaguns, Combi-Melta, Combi-Flamer in Drop Pod
Elites – 5x Sternguard, Sergeant w/ Combi-Flamer, 2x Meltaguns in Drop Pod
Allies: Blood Angels
HQ – Librarian
Troops – 10x Assault Marines, Sergeant w/Power Fist, 2x Meltaguns, Jump Packs
Heavy Support – 10x Devastators, 4x Missile Launchers in Drop Pod
Here was my list:
H.Q.: Farseer, Stones, Jetbike, Fortune, Doom
H.Q.: Farsser, Stones, Jetbike, Mind War, Storm, Guide
8 Warlock on bikes with 1 enhance, 1 embolden, 4 destructors
Elites: 6 Fire Dragons, 1 Exarch w/ tank hunters, crack shot
Wave serpent w/ Shuriken cannon, spirit stones
Troops: 5 man Rangers x 3 (forgot I payed for the pathfinder upgrade on these guys)
Troops: 3 man Guardian Jetbike with cannon x 2
Thanks all. Make sure to subscribe and like. Stop by our site to see some strategy articles and army showcases.
Army Showcase: Paul’s Salamanders w/ Blood Angels
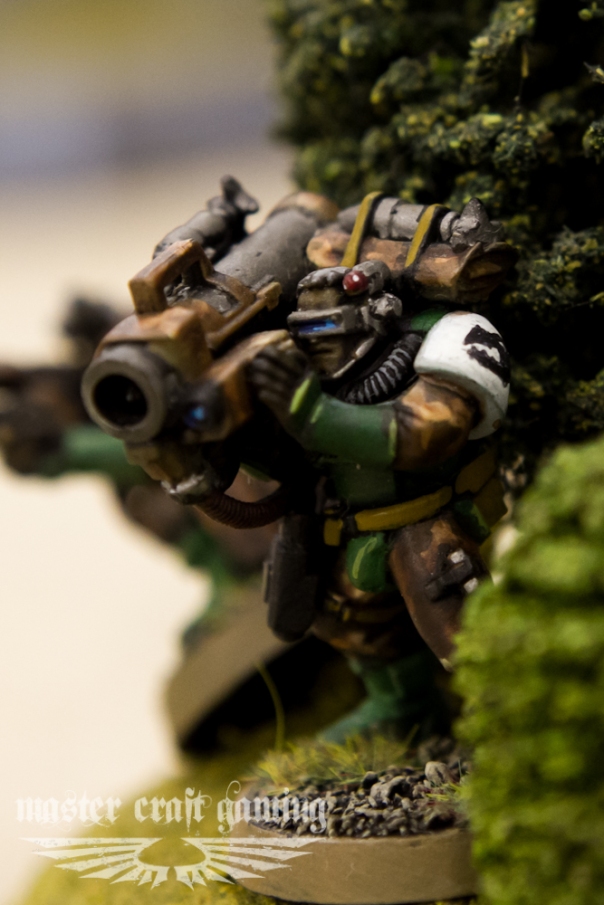
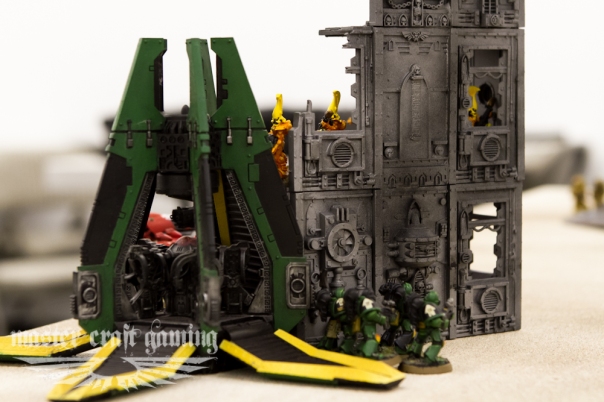
Hey all, themightysquig here bringing you another army showcase. Today we’re looking at some beautiful Space Marine and Blood Angel models. Paul brought this army to take on Son of Adam in our most recent battle report. You can see photos of this army in action in our latest batrep teaser.
Two pieces that I like the most out of this army are the scouts and the assault marines. The camouflage cloaks that the scouts are wearing look amazing in forest terrain, while the assault marines just look really boss. But that’s enough talking for me – take a look at this pics!
Special thanks to Stomping Grounds for letting us take pictures in their store.
Like what you see? Be sure to like, comment, and subscribe! Have any cool models you want to show off? We want to see them! Email me at themightysquig@mastercraftgaming.com to share some photos and stories about your army. We’ll even link back to your blog (if you have one), so don’t hesitate to share!

![IMG_0921[1]](https://mastercraftgaming.com/wp-content/uploads/2012/09/img_09211.jpg?w=604&h=451)
![IMG_0923[1]](https://mastercraftgaming.com/wp-content/uploads/2012/09/img_09231.jpg?w=300&h=224)
![IMG_0919[1]](https://mastercraftgaming.com/wp-content/uploads/2012/09/img_09191.jpg?w=604&h=451)
![IMG_0915[1]](https://mastercraftgaming.com/wp-content/uploads/2012/09/img_09151.jpg?w=604&h=451)


